

3D spatial AI is the practice of turning raw 3D captures into systems that understand space: six skills, one Python toolchain, run in order. Intake, segmentation, learned recognition, semantics you can query in plain words, meshing, and the deployment that carries them. This guide walks all six with a line of real code for each.
Search “3d point cloud tutorial” and you drown. A hundred posts, each solving one tiny slice, none of them agreeing on where that slice sits. That scatter is why so many capable people stall halfway.
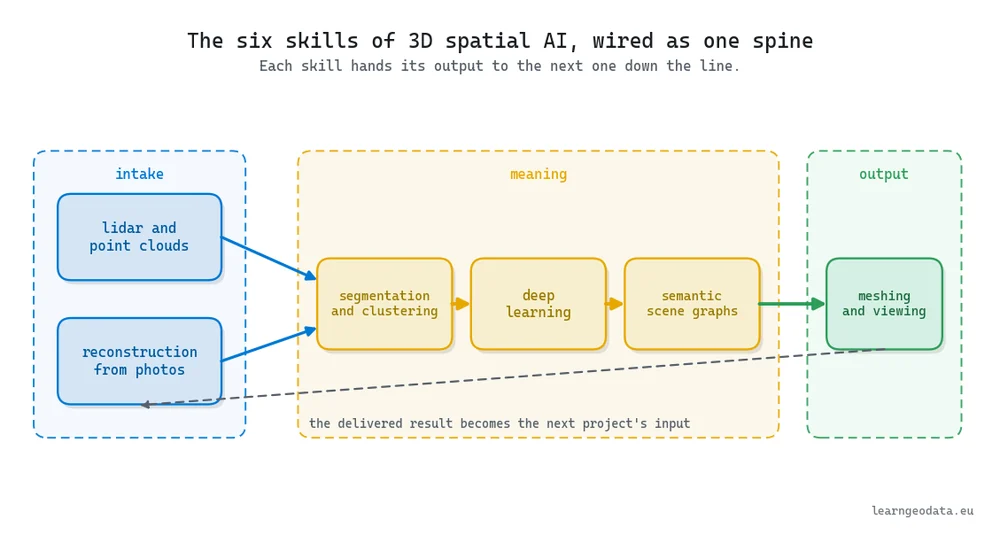
| What it is | The six skills that turn a raw 3D capture into a system that understands space, and the order in which they feed each other |
| What you build | One pipeline: read a scan, split it into parts, recognise them, attach meaning you can query, mesh it, and ship it |
| Libraries | Open3D, laspy, NumPy, scikit-learn, PyTorch, PyTorch Geometric |
| Who it is for | Engineers who can write Python and want the whole map rather than another isolated tutorial |
| Level | Foundational to expert. Each section assumes the one before it. |
Here is the path this guide takes, so you can jump straight to the part you need:
- What 3D Spatial AI Actually Is
- The One Python Toolchain That Runs 3D Spatial AI
- Getting Reality Into The Machine
- Splitting A Point Cloud Into Parts That Mean Something
- Teaching A Network To Recognize The Parts
- Attaching Meaning You Can Query In Plain Words
- Turning A Point Cloud Into A Mesh Anyone Can Use
- Where The Pieces Of 3D Spatial AI Fit Together
- Common Pitfalls And How To Avoid Them
- Build Your First 3D Spatial AI System This Week
- Frequently Asked Questions
What you’ll learn in this article:
- What 3D spatial AI is, and why the middle of the pipeline is where your value sits
- The seven Python libraries that run every stage, and the one to open first
- A worked idea for each of the six skills, from raw scans to a queryable scene
- The parameters that decide your results, with the numbers I actually reach for
- A concrete first project whether you own a scanner or only carry a phone
Estimated reading time: 13 minutes
What 3D Spatial AI Actually Is
Strip away the buzz and the definition is plain. 3D spatial AI is teaching software to understand physical space the way it already understands sentences and photos: capture a scene as points, group and label those points, then reason about what sits where. The skill is turning raw geometry into something a machine can query.
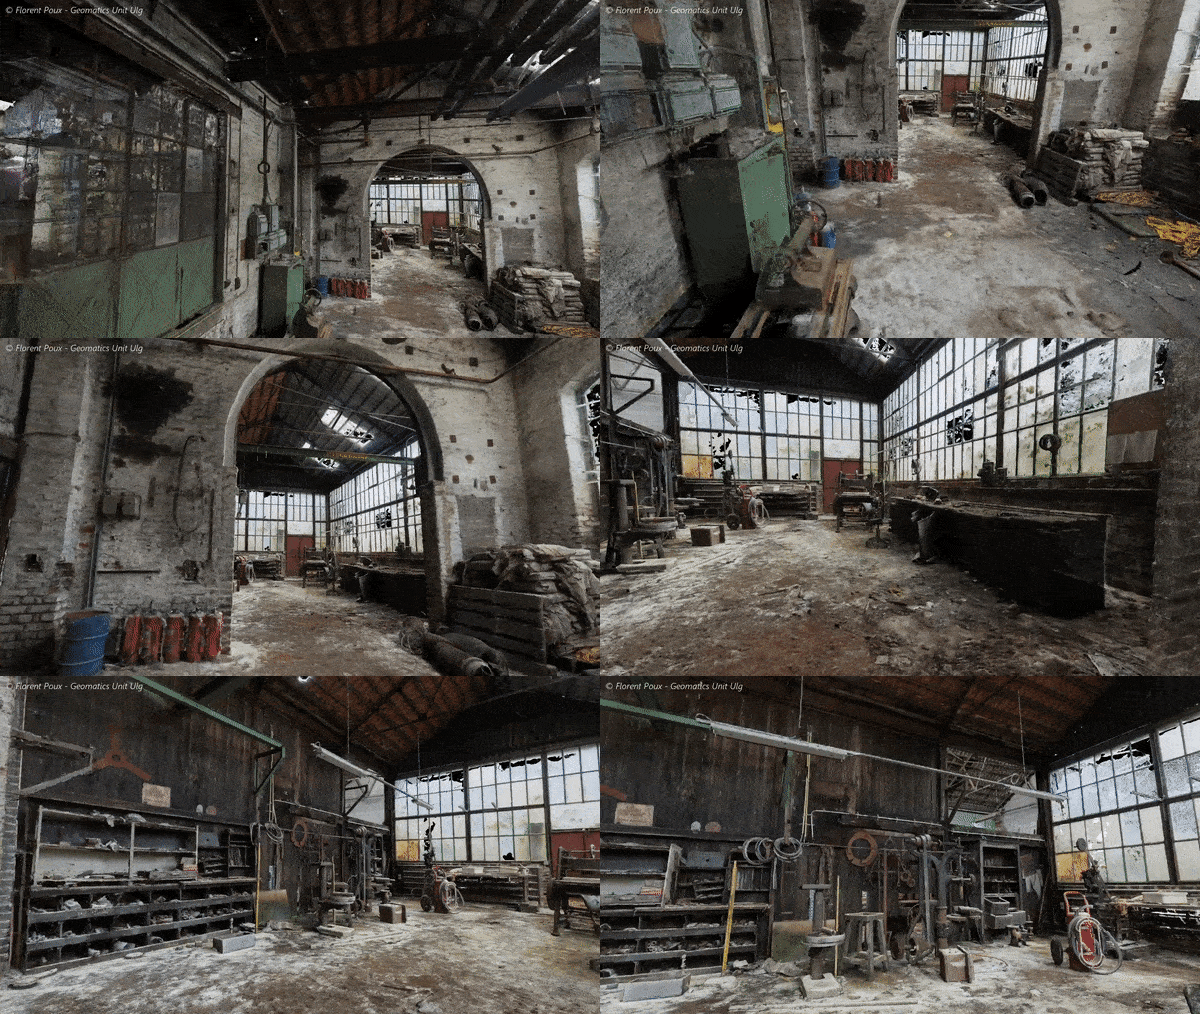
Here is the frame that makes the whole field legible. Any 3D project, in any industry, runs through three stages. You get reality into the machine, you turn that raw data into meaning, and you hand back something a person or a program can act on. Call them intake, meaning, and output, and suddenly every tutorial you have ever saved has a home.
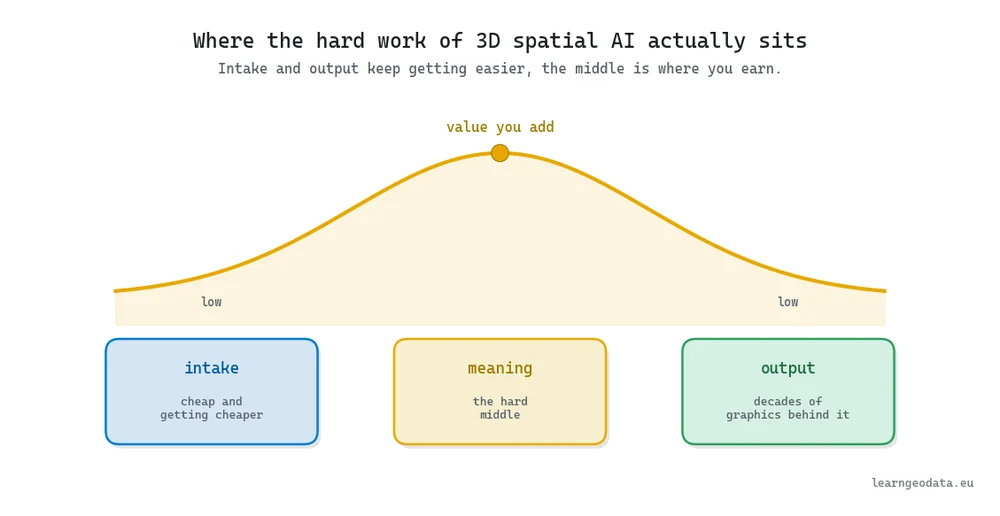
So which stage deserves your attention? The middle, and it is not close. Intake gets cheaper as phones and scanners flood you with points, and output rides on decades of graphics research. But the gap between a raw cloud and a space a machine genuinely understands is stubborn, and that is exactly where a skilled person pulls ahead of a one-click tool.
The six skills below are that middle pipeline sliced into pieces you can pick up one at a time: two for intake, three for the heavy lifting of meaning, and one that closes the loop on output.
🪐 System Thinking Note: The trap is treating these six as separate tricks. They are one machine, and a machine is only as trustworthy as its weakest link. When one point in a fifty-node scene graph carries the wrong label, a language model will reason confidently off that wrong fact and hand you a clean, plausible, useless answer. Hold the whole chain in your head, even when your hands are on one piece.
The One Python Toolchain That Runs 3D Spatial AI
You do not need forty tools. Seven names cover the entire field, and they all live in Python, so you learn one language and get the whole pipeline. laspy and PDAL read and stream the point cloud formats. Open3D handles geometry: loading, filtering, registration, surface reconstruction. Then scikit-learn for classic clustering, PyTorch for the networks, and NumPy underneath doing the arithmetic.
Before you go deep anywhere, earn one small win. Load a scan, thin it, and get a rotating cloud on screen. Here is that first win in real code, reading a LAS tile with laspy and handing the coordinates straight to Open3D.
import laspy
import numpy as np
import open3d as o3d

# Read a LAS/LAZ tile straight off disk
las = laspy.read("scan_tile.las")
xyz = np.vstack((las.x, las.y, las.z)).T

# Hand the coordinates to Open3D
cloud = o3d.geometry.PointCloud()
cloud.points = o3d.utility.Vector3dVector(xyz)

# Thin it so a viewer can breathe, then estimate normals
cloud = cloud.voxel_down_sample(voxel_size=0.05)
cloud.estimate_normals(
    search_param=o3d.geometry.KDTreeSearchParamHybrid(radius=0.15, max_nn=30)
)

o3d.visualization.draw_geometries([cloud])
The one knob to watch is voxel_size=0.05, five centimeters. It collapses every group of points inside a five-centimeter box down to a single point, which is what lets an eighty-million-point tile drop to a couple of million your laptop can actually spin.
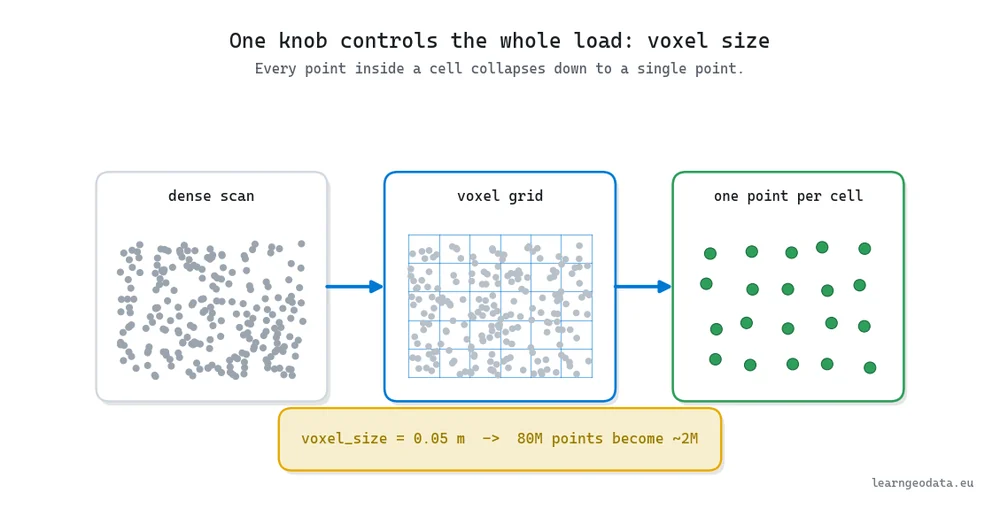
Set that knob too coarse and you erase the detail you came for, too fine and the viewer chokes. The number is a budget, not a magic value, and learning to set it by feel is the first sign you understand your data.
🦥 Geeky Note: Tie the voxel size to the smallest thing you care about seeing. On indoor scans I drop it to two centimeters where the detail earns its point count, and on a city-scale aerial tile I open it to twenty or fifty. Get that mapping right and everything downstream, from normals to segmentation, stops fighting you.
Getting Reality Into The Machine
Almost every 3D system begins at intake, and there are two doors in. The first is a laser scanner. It fires a light pulse and times the return millions of times a second, and each timing becomes one measured coordinate, so a scan is not a picture, it is a dense set of raw positions.
The second door costs nothing you do not already own. 3D reconstruction turns ordinary photographs into geometry, because overlapping images of the same object carry enough parallax to recover depth. Point your phone at a facade, feed a photo to a zero-shot depth model, and seconds later you have a rough cloud with no rig at all.
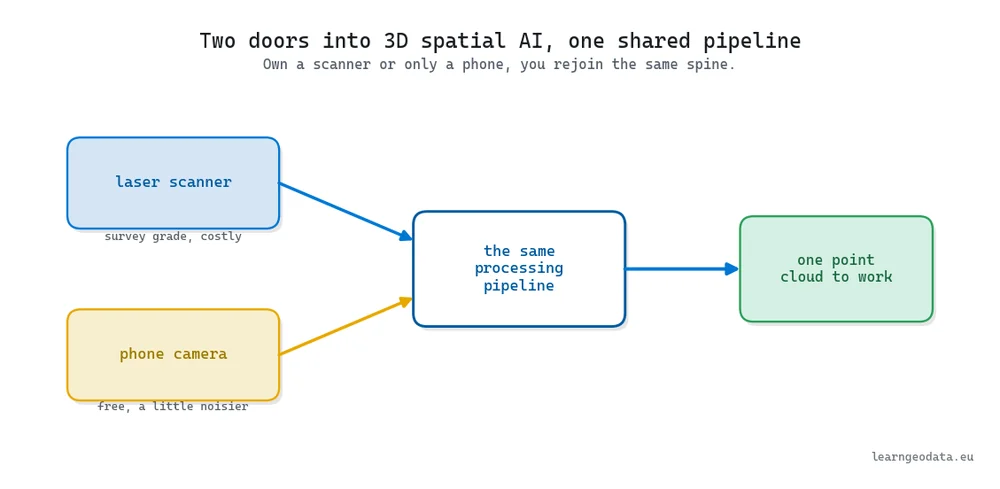
And this is the part that saves beginners a fortune: the door you choose does not change what comes next. Shoot a careful two-hundred-photo orbit through a structure-from-motion stack for a survey-grade cloud, or grab one phone photo and a depth model for a quick one, and both rejoin the identical spine. Newer methods like 3D Gaussian splatting even push those same photos into a scene you can render live.
So pick the door your budget allows and stop feeling locked out. A camera and a laptop are enough to make your first real dataset today. The two sensor families, active and passive, each carry trade-offs worth knowing, and our guide to 3D sensor types walks through both before you choose.
🌱 Growing Note: Run the same object twice, once with a classical orbit and once with an AI shortcut, then compare. Aim for seventy percent overlap between frames on the classical run, the sweet spot where structure-from-motion locks reliably without you shooting a thousand photos. The AI route is faster and noisier, the classical route slower and cleaner, and feeling that trade in your hands teaches more than any benchmark table.
Splitting A Point Cloud Into Parts That Mean Something
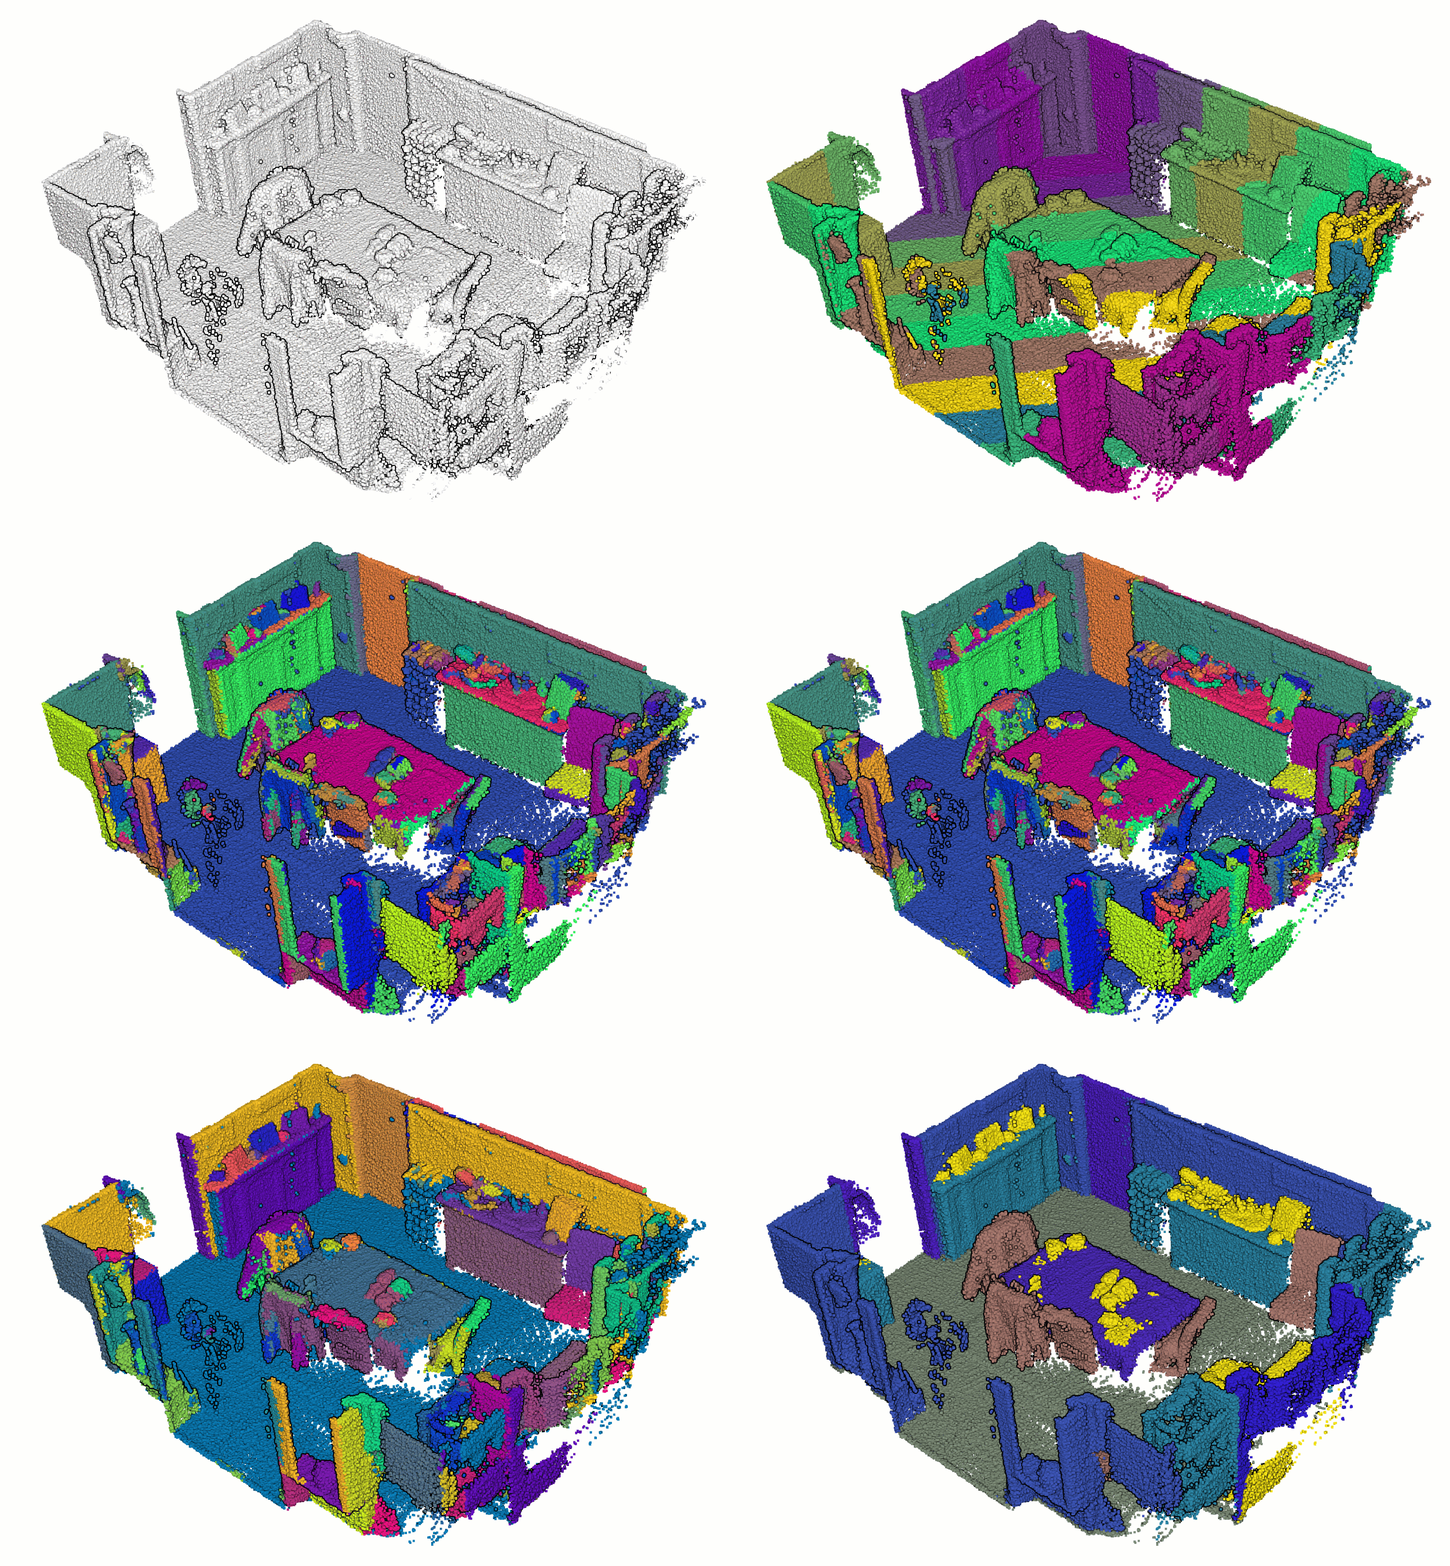
Now the pipeline crosses into meaning, and segmentation is its first real step. A raw cloud is a wall of coordinates that does not know a floor from a pipe. Segmentation groups those points into parts that stand for something, so ground, structure, and objects fall out of the geometry itself.
Start cheap, because cheap handles a large share of real work. Take an industrial plant scan where you want the floor, the walls, and the pipes apart. You fit the dominant plane with RANSAC and lift the floor out in one call, then run DBSCAN on what remains, and the equipment separates into groups by proximity, no labels and no GPU.
Here is that cheap pass in real code. You fit the dominant plane with Open3D, lift those inliers out as the floor, then let DBSCAN group whatever is left by proximity.
import open3d as o3d
import numpy as np

# cloud is the Open3D point cloud from the loader above
# 1) lift the dominant plane out with RANSAC
plane, inliers = cloud.segment_plane(
    distance_threshold=0.02,   # a 2 cm slab still reads as one surface
    ransac_n=3,
    num_iterations=1000,
)
floor = cloud.select_by_index(inliers)
rest = cloud.select_by_index(inliers, invert=True)

# 2) cluster what remains by proximity, no labels and no GPU
labels = np.array(
    rest.cluster_dbscan(eps=0.10, min_points=15)   # eps ~ 3x point spacing
)
print(f"{labels.max() + 1} objects found around the floor")
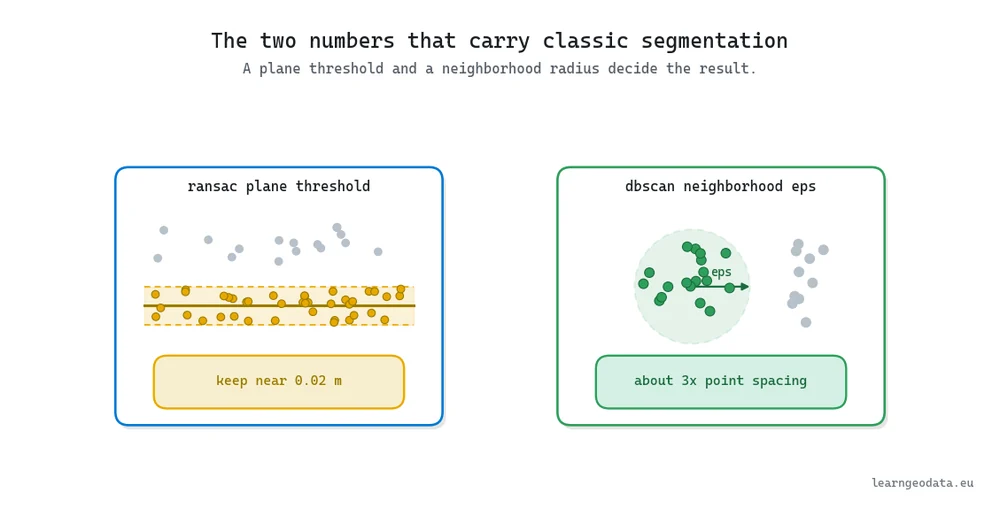
Two parameters decide almost everything here, and they are worth learning cold. The RANSAC plane threshold sets how bumpy a floor can be and still read as one surface. The DBSCAN neighborhood radius, its eps, sets how close points must be to belong to the same object.
Get comfortable in this cheap zone before you reach for anything heavier. A plane fit plus a clustering pass still solves a surprising amount of production work in about fifteen lines of code. If you want the fuller walkthrough of the methods, see our guide to 3D point cloud segmentation with Python.
🦚 Florent’s Note: People reach for a neural network the second they hear the word segmentation, and nine times in ten they did not need one yet. I keep the plane threshold near two centimeters so a slightly uneven floor still reads as one surface, and I set eps to roughly three times the average point spacing so genuine objects group without bleeding into their neighbors. Learn those two numbers by hand and you will out-diagnose people who skipped straight to a model they cannot debug.
Teaching A Network To Recognize The Parts
Still inside the meaning stage, this skill swaps hand-tuned rules for a network that learns the parts you grouped by hand a moment ago. The payoff is generality. A trained model reads cluttered scenes where fixed rules fall apart, because it has seen enough labeled examples to recognize an object instead of matching a shape you hard-coded.
The awkward thing about learning on point clouds is that points arrive in no fixed order, and a network has to give the same answer no matter how you shuffle them. PointNet cracked that in 2017 with a design that reads an unordered set and still returns a stable per-point label, and its descendants have built on the idea ever since.
Now let me correct the belief that trips up almost everyone. The model is rarely where you lose. Data preparation is.
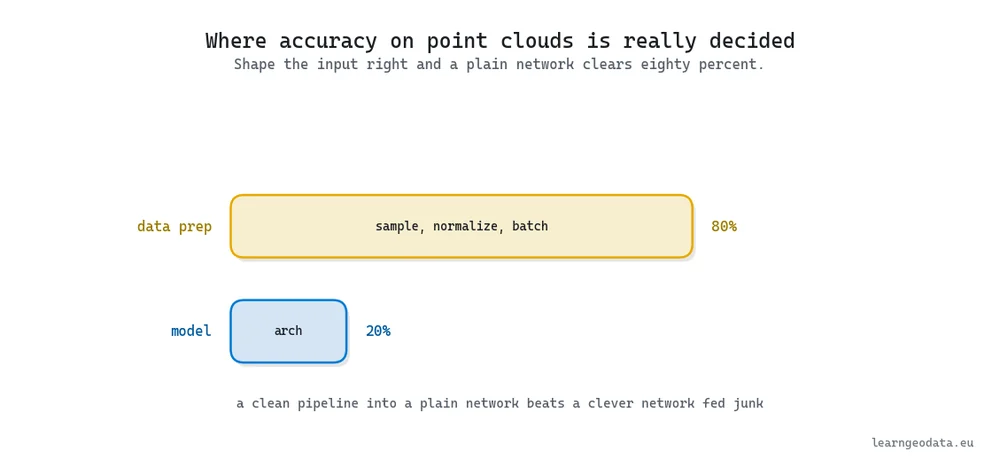
Get the sampling, normalizing, and batching right and a plain network climbs past eighty percent on held-out data. Feed a brilliant architecture badly shaped tensors and it learns nothing worth having. That single truth will save you weeks of chasing the wrong fix.
So where do you spend your first week? On how the data enters the network, not on the leaderboard. It is a boring answer, and it is the one that will save you the hardest week. If you want a roadmap for the whole subject, our 3D deep learning essentials guide lays out the resources and the order to learn them in.
🦥 Geeky Note: When a student stalls at sixty percent accuracy, they almost always go architecture shopping, and it is the wrong shelf. Check the block size, the point sampling, and the normalization first, because fixing the input pipeline usually drags the same model up past eighty. The network is a smaller lever than the data feeding it, every single run.
Attaching Meaning You Can Query In Plain Words
Open-vocabulary semantics is the deep end of the meaning stage and the freshest edge of the field. Semantic spatial AI attaches open-ended meaning to a scene, then rewrites it as relationships a language model can walk. The unlock is that you drop the fixed class list, so instead of retraining for every new object, you describe what you want in plain words and the scene answers.
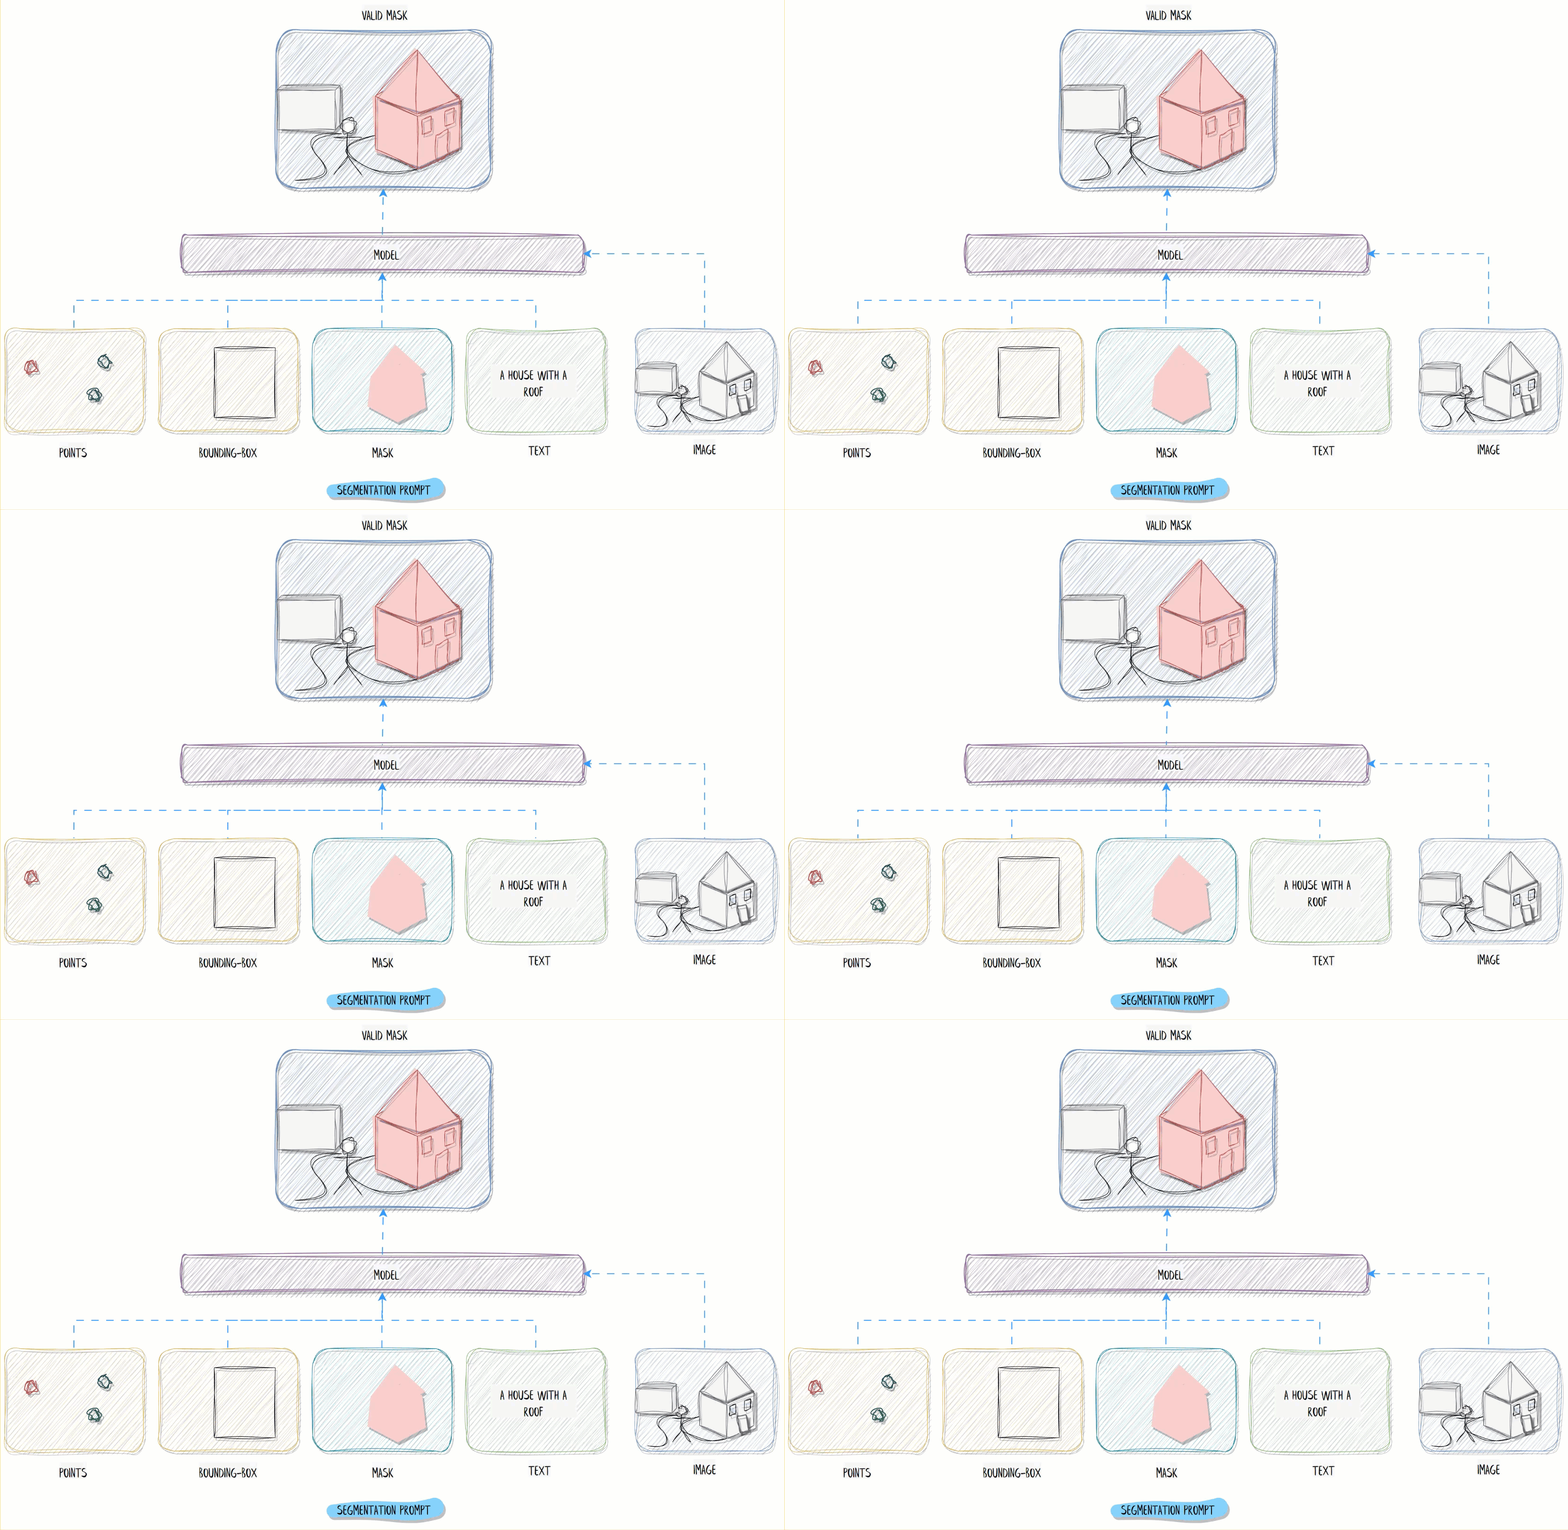
Walk it through once. You film a room with your phone, build a cloud, level it to gravity, then label it by typing words like chair, door, and radiator. Pretrained image models turn each word into a concept and ground it to the actual points, and open segmenters like Segment Anything sharpen the boundaries.
Then comes the good part. The room gets rewritten as a graph of nodes and edges, chair on floor, next to table, and a language model can walk that graph to answer a question out loud.
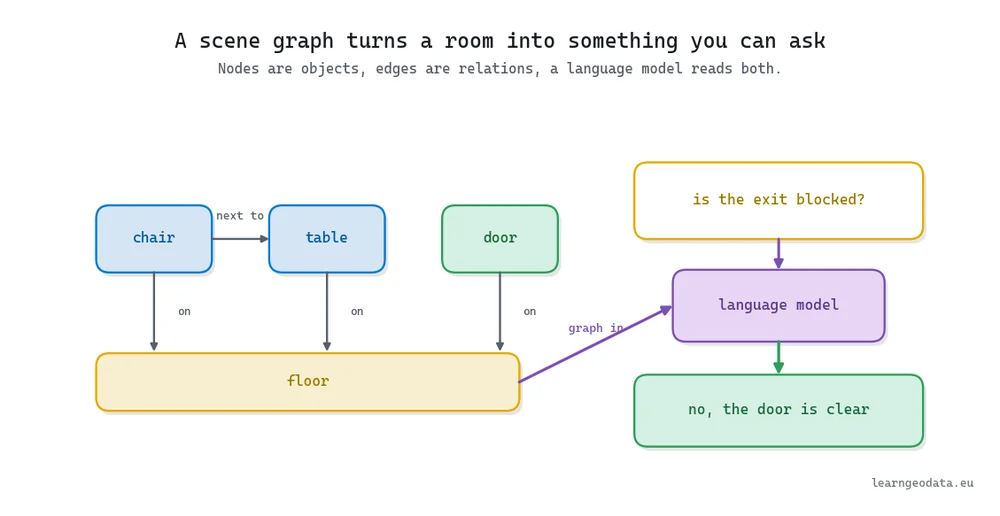
A phone video became a scene you can interrogate in ordinary English. That is not a demo, that is a product, and a queryable space is what companies actually buy. For the full method, see our guide to open-vocabulary 3D semantics in Python.
🪐 System Thinking Note: This skill only stands because everything before it holds, so it doubles as a stress test for your whole pipeline. Level the room and a one-degree tilt quietly throws off every measurement downstream, the way a crooked foundation ruins a straight wall. The graph is only as good as the labels, the labels only as good as the segmentation, and the segmentation only as clean as the cloud you captured.
Turning A Point Cloud Into A Mesh Anyone Can Use
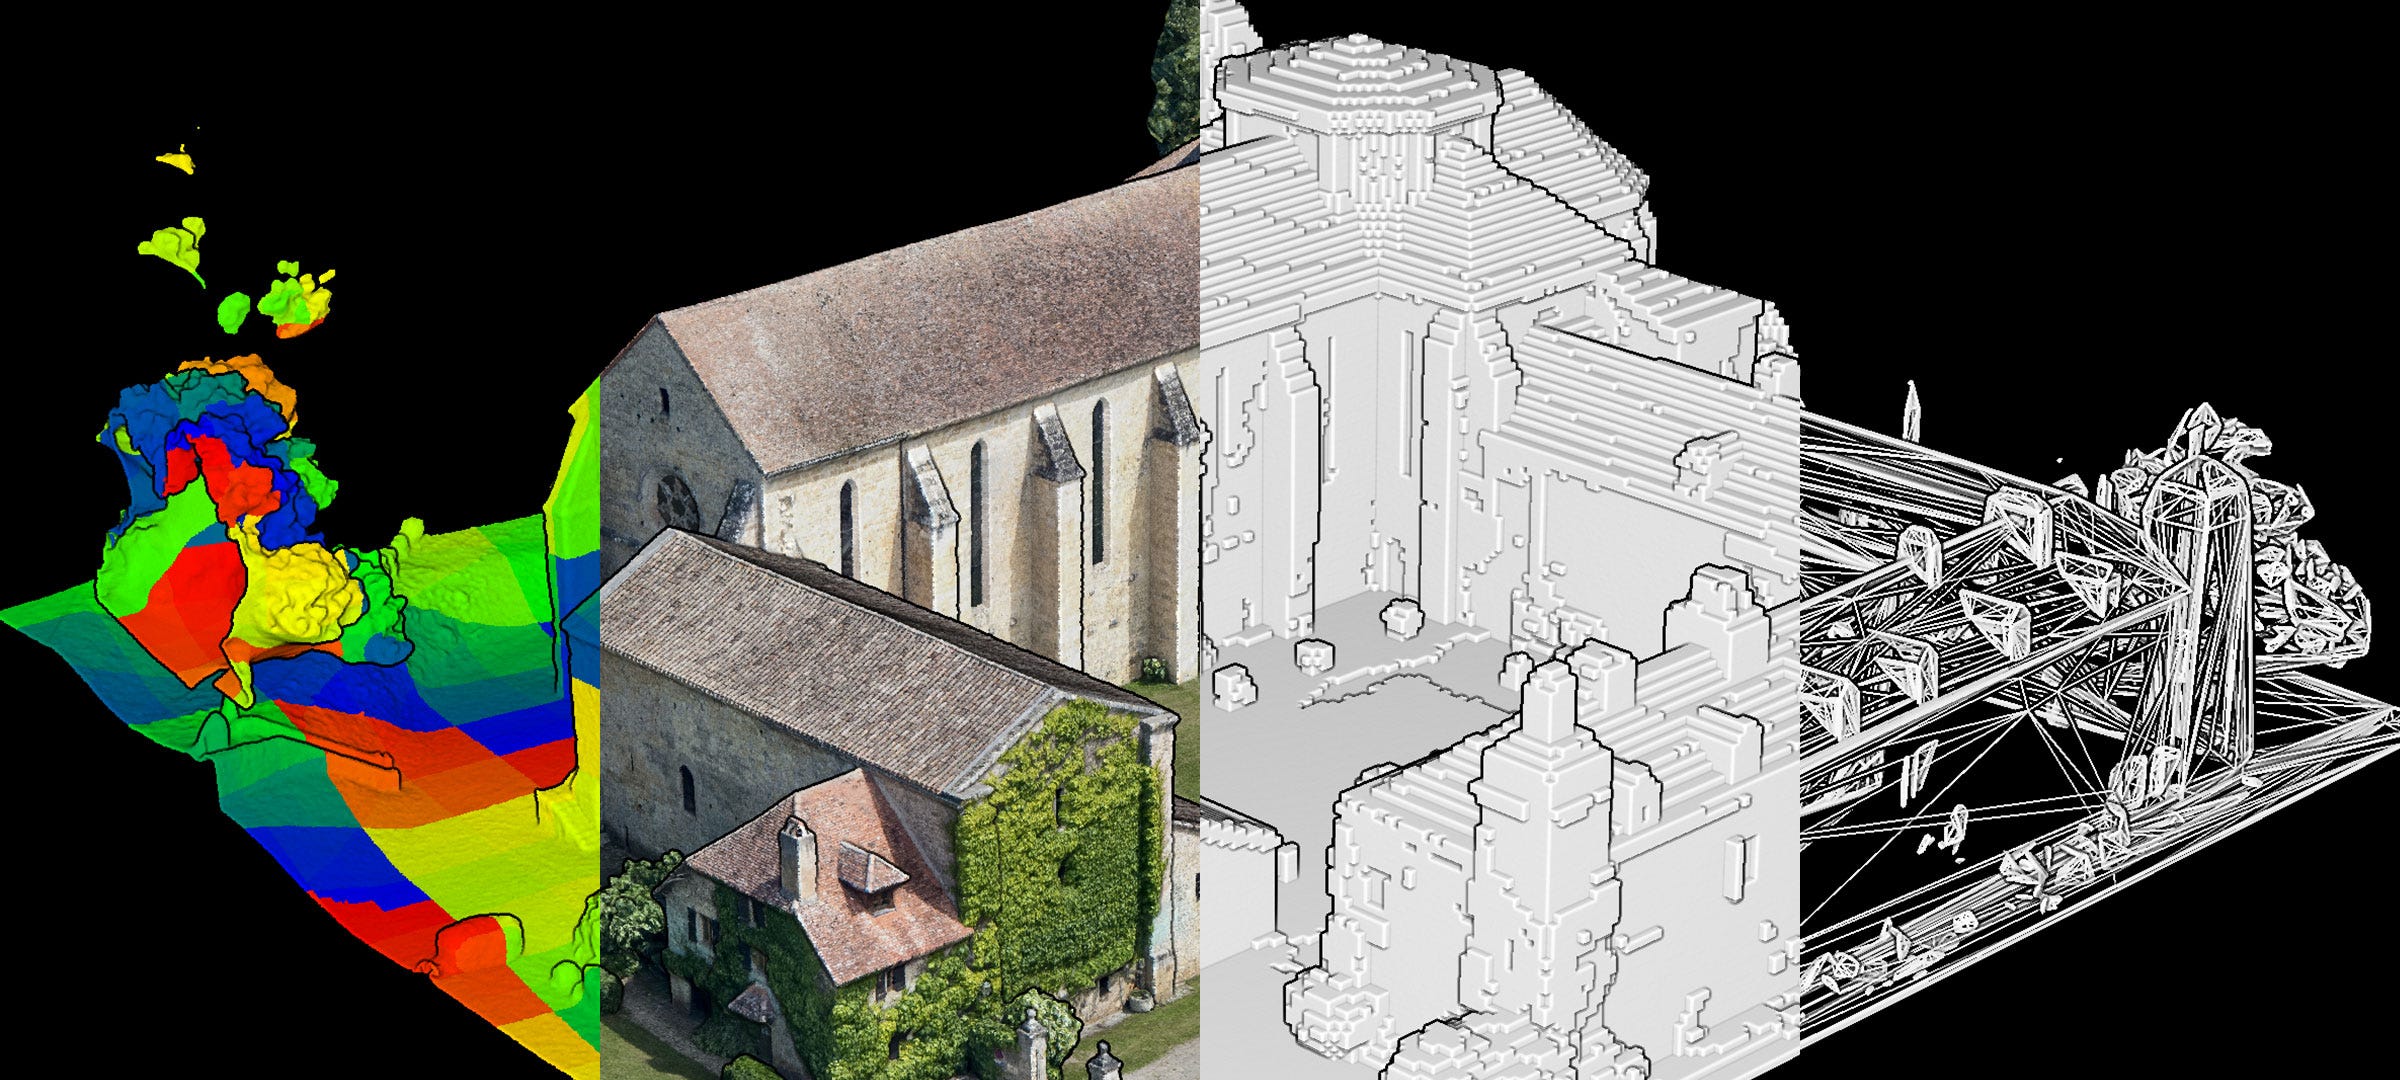
The last skill sits at output and quietly owns both bookends: getting data in cleanly and getting the result seen. A scene that means something is worthless if nobody can hand it over. Meshing wraps your points in a web of triangles, a continuous surface you can measure, print, or drop into a game engine.
Take a bridge inspection. You have a terrestrial scan with millions of points, and you need two deliverables from it: a solid model an engineer can measure, and a view a client can spin on a phone. One reconstruction, two audiences.
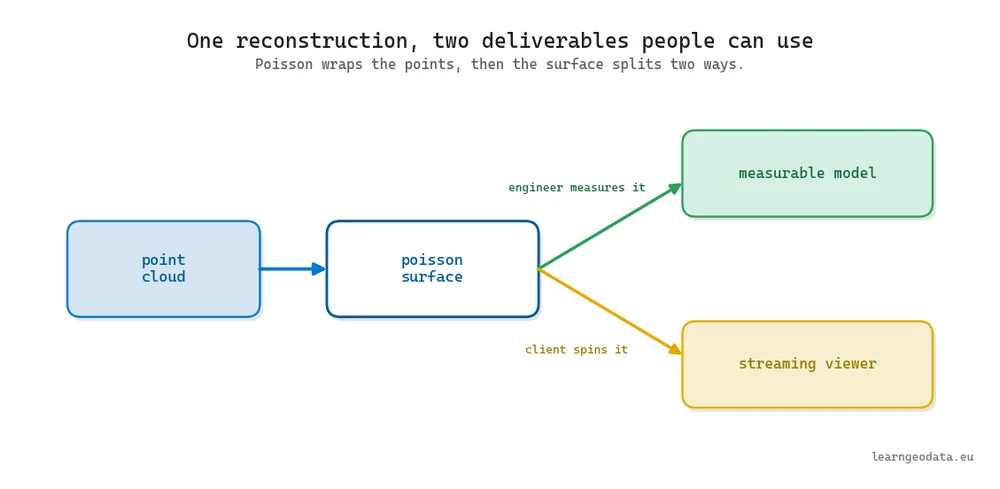
You run Poisson surface reconstruction and the cloud becomes a watertight mesh, then serve it through a viewer built to stream clouds far too large for a normal one. Intake the input clean, deliver the output seen, and the loop closes on itself, because that delivered result becomes the next project’s starting point. Our point cloud to 3D mesh guide walks the meshing step in full.
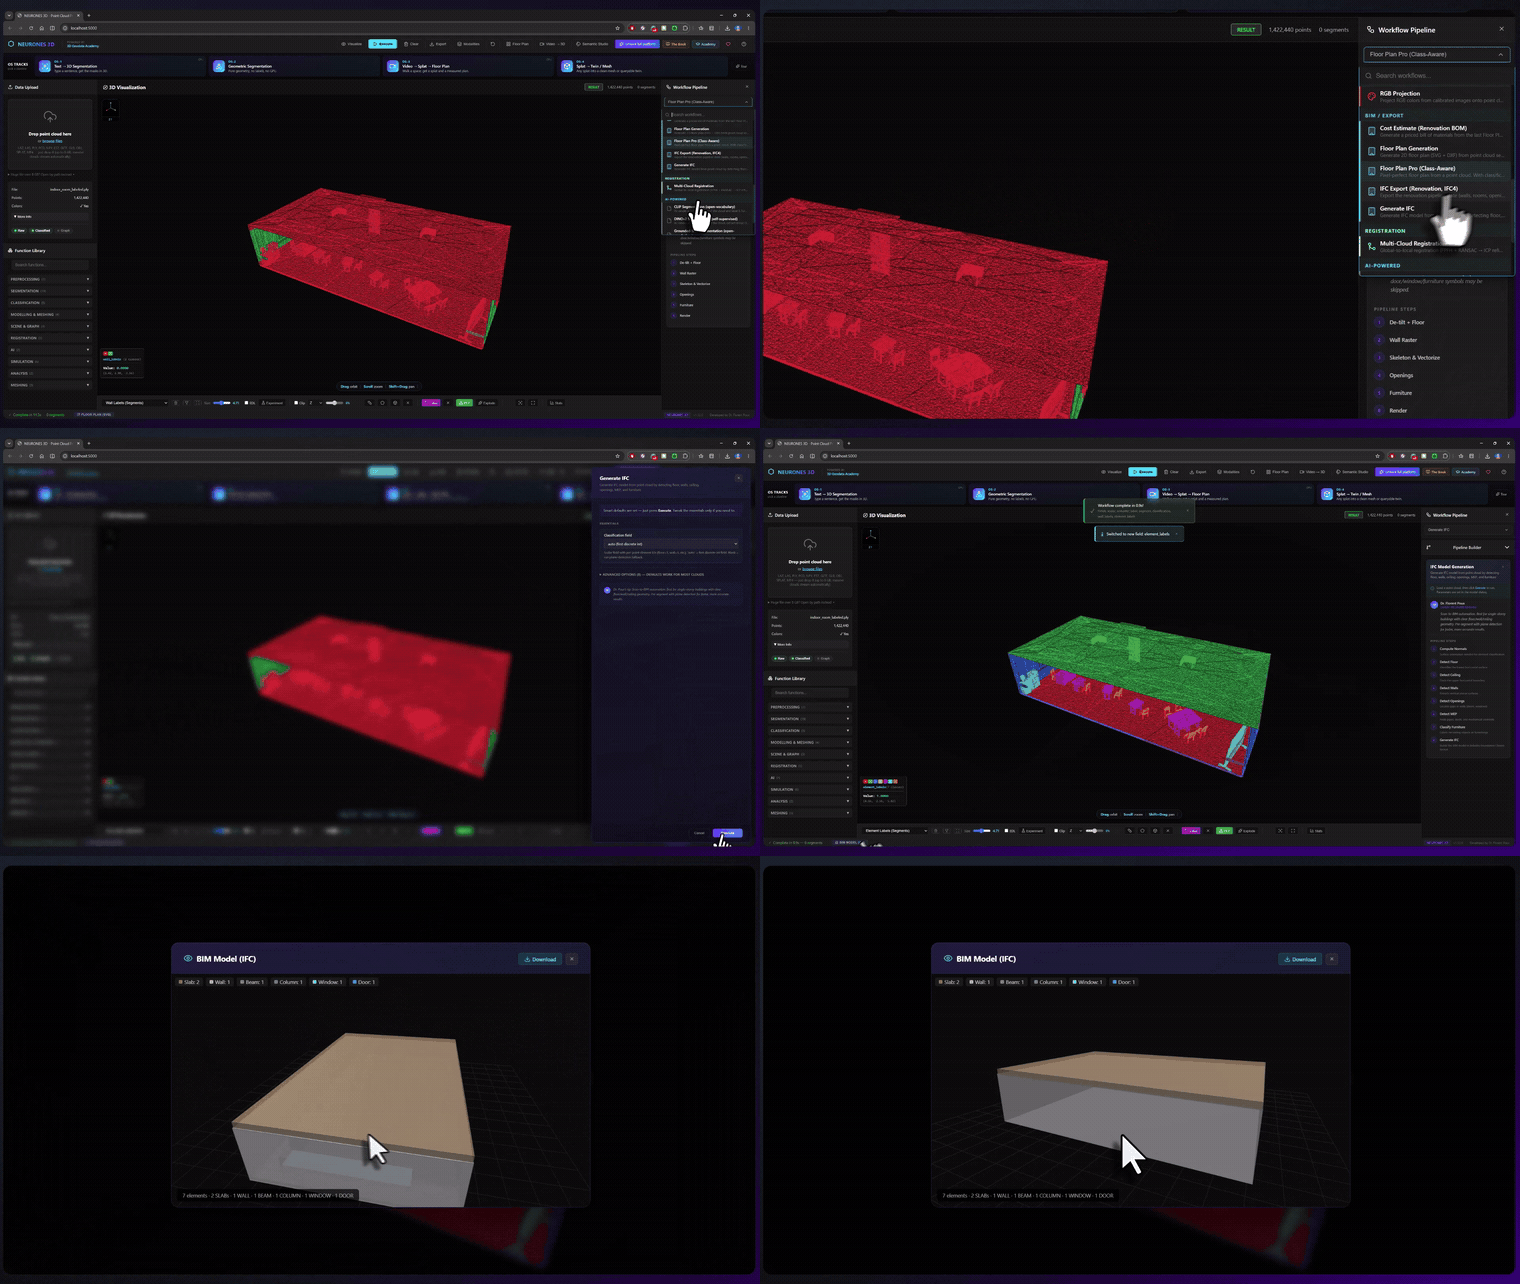
🌱 Growing Note: Take one cloud all the way to a rendered frame and a served viewer before you call this skill learned. A streaming viewer built on an octree can hand a client a hundred-gigabyte cloud in under a second, and watching that happen teaches you why capture discipline back at stage one mattered so much.
Where The Pieces Of 3D Spatial AI Fit Together
Six skills, one pipeline. The value was never in any single call, it lives in how they wire together: the clustering output feeds the network, the network’s labels feed the scene graph, and the graph is what lets a language model reason about a space. That chain is a system, and a system is what companies pay for, while a one-click tool only hands them a button they cannot fix when it breaks.
Each skill has its own deep guide on this site, so treat this as your next set of clicks:
- LiDAR and point cloud processing in Python (new part, releasing July 15), for loading, cleaning, and streaming raw scans.
- 3D reconstruction in Python (new part, releasing July 22), for building clouds from photos with no scanner.
- 3D point cloud segmentation and clustering in Python (new part, releasing July 29), for splitting a cloud into parts that mean something.
- 3D deep learning in Python (new part, releasing August 5), for teaching a network to recognize those parts.
- Open-vocabulary 3D segmentation and scene graphs in Python (new part, releasing August 12), for meaning and relationships a language model can walk.
- Point cloud to mesh in Python (new part, releasing August 19), for turning points into a surface and a view.
If you would rather learn the whole chain as a guided path instead of six separate reads, the 3D AI Program walks it end to end with production code and the parameter intuition an article cannot give you.
Common Pitfalls And How To Avoid Them
A few mistakes swallow more beginner time than the rest combined, so let me name them plainly. The first is confusing “read a LAS file” with “read one without freezing,” because the second, streaming in blocks of about five million points, is the lesson the job actually pays for.
The second is skipping the cheap tools. People jump to deep learning before they have run a single RANSAC plane fit, then cannot tell whether the network is even working.
The third is trusting a pretty result. A dense splat or a clean mesh looks finished, but a picture is not a deliverable. The moment a client asks “how wide is that opening,” only a structured, queryable scene answers, and that is the whole reason the meaning stage exists.
The fourth is learning the skills as islands. Every parameter you set early ripples forward, so a sloppy capture poisons the segmentation and a mislabeled segment poisons the graph.
Build Your First 3D Spatial AI System This Week
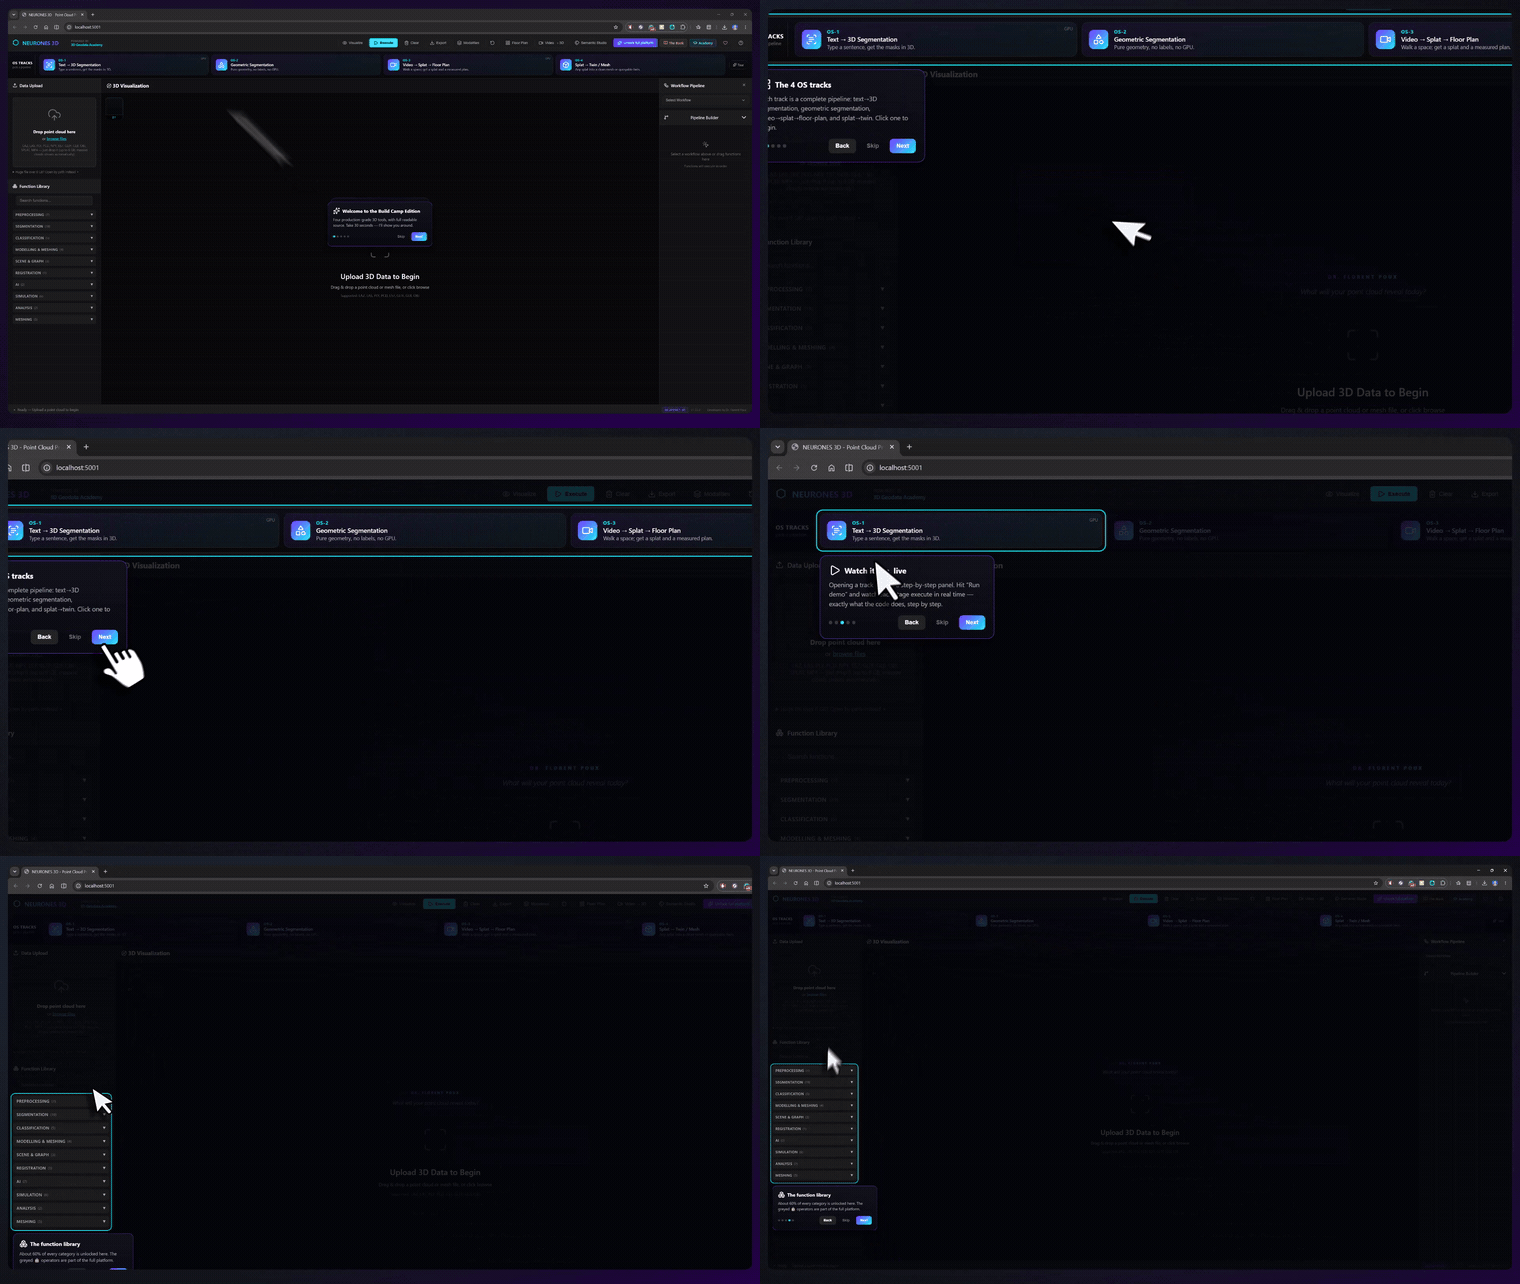
Reading the map is not the same as walking it, and this skill only sticks in your hands. So pick the smallest honest project you can finish. If you own a scan, load it, clean it, and cluster it into three parts. If you own only a phone, film one object, reconstruct it, and get the cloud rotating on your screen.
That single loop, from raw data to a result you can look at, teaches you more about where this technology helps and where it quietly lies than any article can. If you would rather build than keep reading, start the free mission this afternoon and write real 3D Python before dinner.
And when you are ready to stop assembling scattered skills and learn the whole pipeline as one deliberate path, the 3D AI Program is where that happens. So here is the real question to sit with: when you finish that first loop from raw data to a result, which of the six skills will you reach for next?
Frequently Asked Questions
What software do I actually need to start with 3D spatial AI?
Less than you would expect. A Python environment and a handful of open libraries cover every skill: Open3D for geometry, laspy for reading scans, scikit-learn for clustering, and PyTorch when you reach the networks. Install them one at a time as each stage needs them rather than all at once, and let each project pull in only what it touches.
Can I learn 3D spatial AI without owning a laser scanner?
Yes, completely. Photogrammetry and AI depth models build point clouds from ordinary photos, so a camera and a laptop are enough to make your first real 3D dataset. Methods like 3D Gaussian splatting even turn a photo set into a renderable scene, and once you have a cloud you rejoin the same pipeline a scanner owner uses.
Should I learn classic algorithms first or jump straight to deep learning?
Start with the classic tools, and it is not a close call. A scikit-learn clustering pass plus a plane fit solves a large share of real segmentation jobs for zero GPU and about fifteen lines of code. Learn those cold and you will understand what a network is doing when you get there, instead of treating it as a box you cannot open.
How much math do I need for 3D deep learning in Python?
Less than the intimidation suggests. You need comfort with vectors, a feel for how a loss function nudges weights, and the patience to shape your input data correctly, which is where beginners lose the time. The framework, PyTorch, handles the calculus for you, so the real skill is the data pipeline, not the equations.
How long does it take to learn the whole pipeline?
Plan in focused weeks per skill, not years for the whole map. The spine of processing, segmentation, and a first network is a few weeks if you build as you go, and the structured route through all six skills is exactly what the 3D AI Program is built to compress.

